Setting up JunOS Olive and adding it to GNS3.
Hello. Today, I will be showing you how to set up JunOS Olive in VirtualBox and get it added to GNS3. To accomplish this, you will need the following:
1. GNS3 - https://gns3.com/software
2. VirtualBox - https://www.virtualbox.org/wiki/Downloads
3. JunOS Olive - https://docs.google.com/uc?export=download&confirm=h4IB&id=0B0CNLUI2sBtRcU1Bb0FGWGNoeTQ (Yes, it's safe. I promise.)
4. OPTIONAL - GNS3 VM - https://gns3.com/software/download-vm
Once you have everything downloaded, install GNS3 and VirtualBox (and optionally the GNS3 VM) like you normally would. I am not covering those installations here but there are plenty of guides on them if you Google around. Once they are installed, launch VirtualBox and GNS3. Now, lets start in VirtualBox.
Click on "File" then "Import Appliance".
On the next screen click the folder icon to the right and navigate to where you have the JunOS Olive Appliance saved. Double-click on the appliance file and then click "Next" at the bottom of the window.
Keep all of the default values and click "Import".
Next select the JunOS Olive VM in VirtualBox, click on "Settings", click on "Network", and change the adapter to your Loopback adapter. If you do not have a Loopback adapter installed, you can use this guide (http://nil.uniza.sk/windows/windows-10/how-install-microsoft-loopback-adapter-windows-10) to install one in Windows 10. Make sure you go under the advanced settings and de-select "Cable Connected" or you will not be able to use the adapter in GNS3.
NOTE: If you want to have more than one interface available on the JunOS Olive device in GNS3 (which you should) you would add them here as well. Just use a Bridged adapter and connect it to your normal Network Card. I added 2 extra interfaces, for a total of 3 interfaces, in mine.
That's it for VirtualBox.
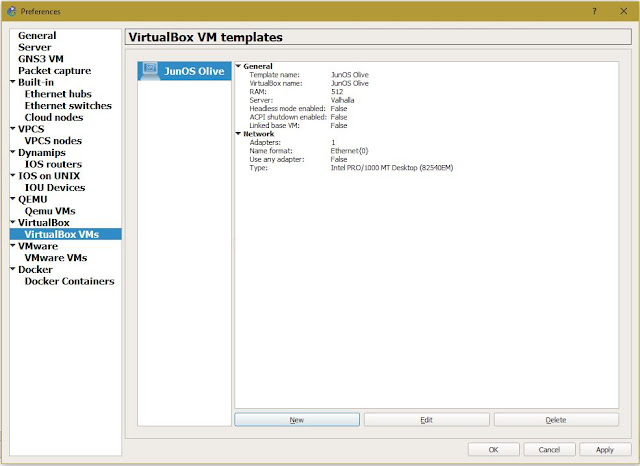
Next load up GNS3 and start a blank project. Once it is loaded click on "Edit" and then "Preferences...". On the left-hand side select "VirtualBox VMs" under the "VirtualBox" heading.
Click on "New" then "Next".
Under the "VM list" ensure that JunOS Olive is selected. If it is not click on the drop down menu and select it. If it does not show up something went wrong. Go back and make sure you are following everything exactly. Then click "Finish".
Click "Apply" and then "OK".
That's it! The JunOS Olive device can be found under the "All Devices" section within GNS3 and it is ready to use!
If you would like to have the JunOS Olive deice show up under the "Routers" section (or any other section) right-click on the JunOS Olive device and click "Configure Template".
From here change the "Category:" from "End devices" to "Routers". You can change the "Symbol:" to change how it appears in GNS3 as well. Just click on "Browse" next to the symbol path. I changed mine to a Router.
If you enabled other adapters in VirtualBox that you would like to be able to use in GNS3 click on the "Network" tab and change "Adapters:" to however many you like. Just don't try to add more than you have set up in VirtualBox or it will give you an error.
Now your JunOS Olive device will show up under the Routers section in GNS3 with the Router symbol!
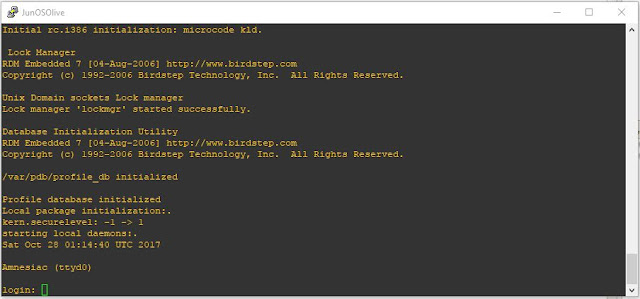
To use the JunOS Olive device (or any device in GNS3) drag it to your workspace, right-click on it, and then click "Start". After it starts right-click on it and open a Console connection to configure it. Note that devices can take a while to start. Especially on a host machine that has a slower processor or not a lot of RAM. Give it some time and you should eventually get to the JunOS login screen.
When configuring interfaces on the JunOS Olive device you will be using the "em" interfaces. These are FastEthernet interfaces.
Here is a simple network that I set up using all 3 interfaces.
To set the IP address of a Host PC in GNS3 use the command "ip address mask gateway" as shown here:
Now a ping test to make sure the connections are working.
That's all I have for now. As always, please let me know if you find any errors, especially technical errors, in this post. Now go out there, install JunOS Olive, and have fun with it!


Comments
Post a Comment